1: GraphQL Set up
Important: we are not recommending you to avoid Publications and Methods, the goal of this tutorial is just to teach you how to use Meteor with GraphQL in case you like both.
1.1: Install GraphQL packages
Start off by installing the package quave:graphql following all the steps in the Installation section. The server and client set up we’ll cover below.
Important note: When installing the graphql and graphql-tools packages, make sure to keep in those versions:
graphql@15.8.0 graphql-tool@7.0.5. Higher versions are not supported by quave:graphql.
This package uses Meteor DDP as data layer and Apollo as GraphQL implementation.
1.2 Set up server
Create a new file called graphql.js inside the api folder. This file will be the server entrypoint to our resolvers and schemas.
imports/api/graphql.js
import { Meteor } from 'meteor/meteor';
import { startGraphQLServer } from 'meteor/quave:graphql/server';

const log = error => console.error('GraphQL server error', error);

const UserSchema = `
  type Query {
    loggedUser: User
  }

  type User {
    _id: ID!
    username: String
  }
`;

const UserResolvers = {
  Query: {
    async loggedUser(root, args, { userId }) {
      if (!userId) {
        return null;
      }
      return Meteor.users.findOne(userId);
    },
  },
};

startGraphQLServer({ typeDefs: [UserSchema], resolvers: [UserResolvers], log });
The code inside this file is fairly simple. We have our schema inside the variable UserSchema and we have our resolver inside our variable UserResolvers. Then, we provide these data to the function startGraphQLServer, which is responsible for starting the GraphQL server, alongside a log function that will be called every time we have an error with the GraphQL on the server side.
For now, we just have a loggedUser query that we’ll test soon using the Apollo Dev Tools.
If you want to learn how schemas and resolvers work on GraphQL, you can check out their docs.
Now, let’s import this file into our app server.
server/main.js
import { Meteor } from 'meteor/meteor';
import { Accounts } from 'meteor/accounts-base';
import { TasksCollection } from '/imports/db/TasksCollection';
import '/imports/api/graphql';
..
1.3 Set up client
Now let’s set up our client. As we’re working with React, we can use the Apollo react-hooks to be able to call our queries and mutation from the client.
Go ahead and install the package @apollo/react-hooks.
meteor npm install @apollo/react-hooks
Once this package is installed, let’s change our main client file to use the ApolloProvider.
client/main.js
import React from 'react';
import { Meteor } from 'meteor/meteor';
import { render } from 'react-dom';
import { App } from '/imports/ui/App';

import { startGraphQLClient } from 'meteor/quave:graphql/client';

import { ApolloProvider } from '@apollo/react-hooks';

const apolloClient = startGraphQLClient({ connectToDevTools: true });

Meteor.startup(() => {
  render(
    <ApolloProvider client={apolloClient}>
      <App />
    </ApolloProvider>,
    document.getElementById('react-target')
  );
});
Notice that when we’re starting the GraphQL client (startGraphQLClient()), we’re providing the attribute connectToDevTools as true. This attribute, when true, allows us to access the Apollo Dev Tools and call mutations and queries from there.
1.4 See Apollo Dev Tools working
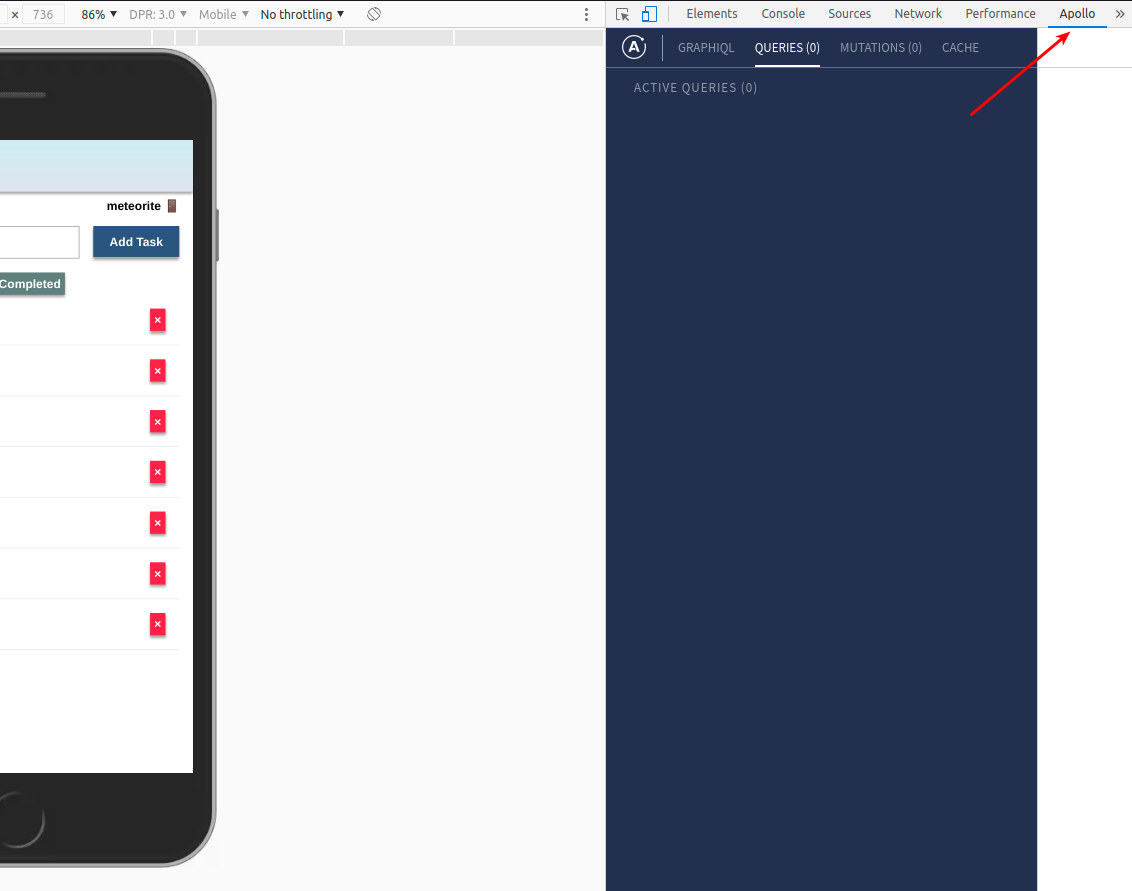
If you still don’t have the Apollo Dev Tools extension installed on your browser, you can check here how to install it on Chrome or Firefox.
Once it’s installed, let’s test our query loggedUser. With your app started, access your browser dev tools and under the tag Apollo you will see something like in the image below.
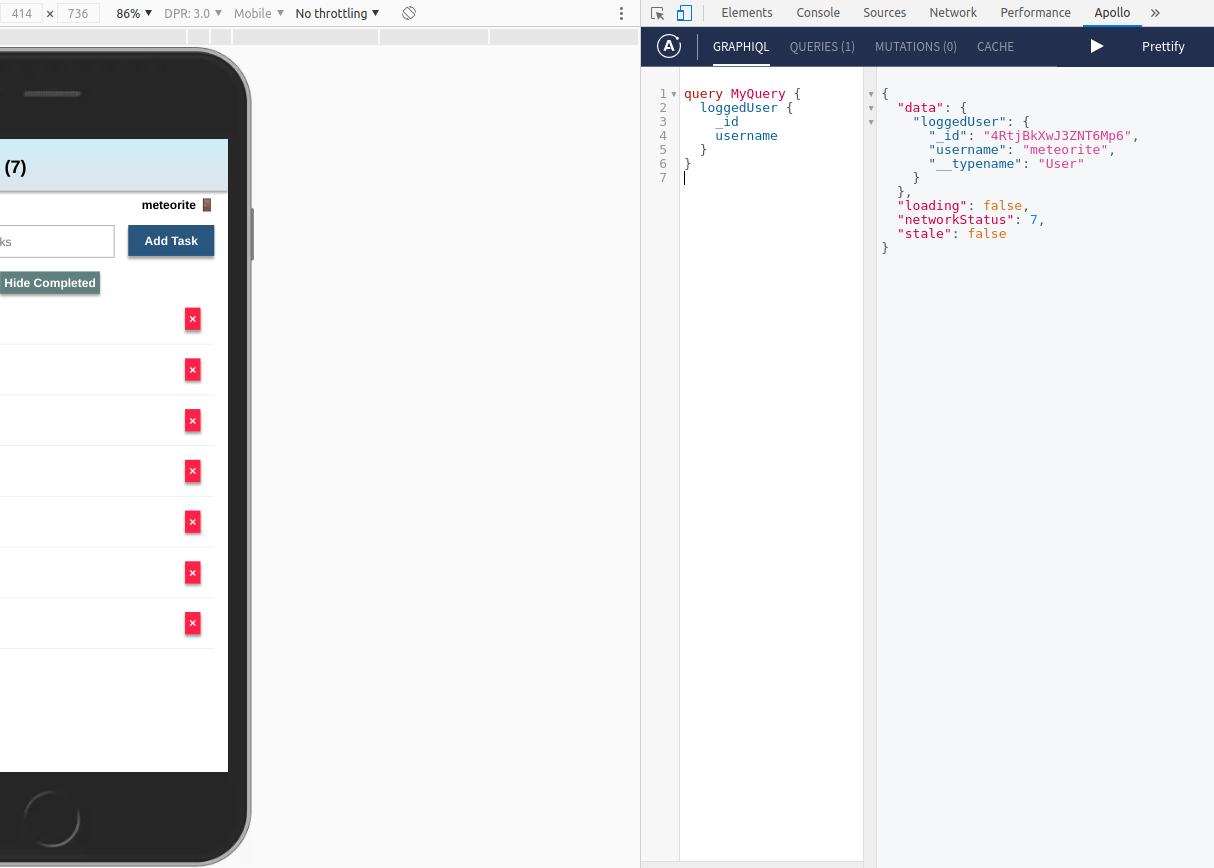
Now, let’s test the loggedUser query there. Click in the GRAPHQL tab, type the query below to it, and then press the run button.
query MyQuery {
    loggedUser {
        _id
        username
    }
}

Once you hit the run button, you should see something like in the image below.
If you log out and then hit the run button again, you should see something like this:
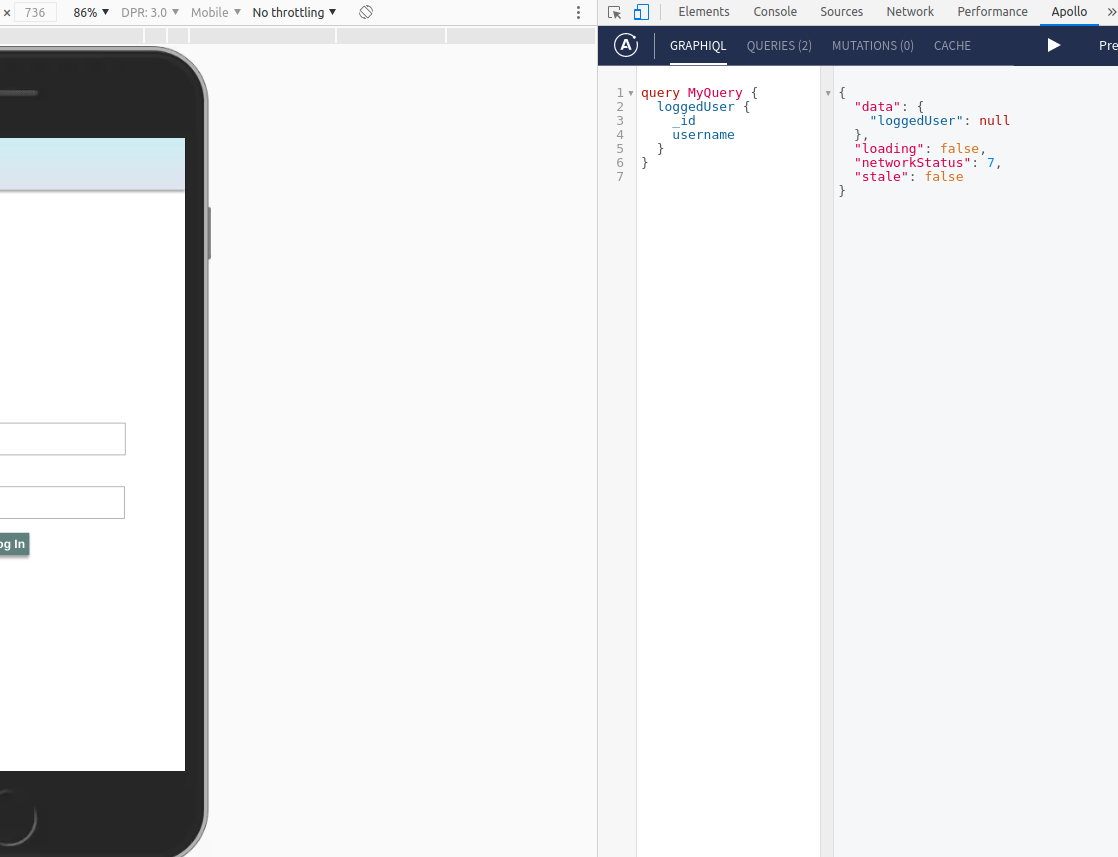
This shows that our app is now working with GraphQL.
Review: you can check how your code should be at the end of this step here
In the next step, we’ll see how to load specific data to our Minimongo.